One thing I love about owning my own business is the opportunity to learn new things. Here at Superior Shop Drawings, we are always on the lookout for ways to be more efficient when creating Millwork Shop Drawings. To do this, Steve and I explore different AutoCAD Commands and trade notes. A couple of years ago he introduced me to the AutoCAD DimSpace Command and it made a massive difference in the way I dimension drawings.
The AutoCAD DimSpace command is short for Dimension Spacing. This command allows you to align and space your dimensions through the Command Prompt quickly. A value of 0 will align your dimensions, and any other number will offset your Linear or Aligned Dimensions by that value.

Table of Contents
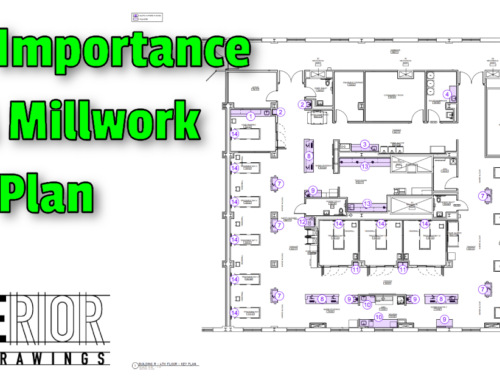
Changing The Way I Dimension Millwork Shop Drawings
I got my start as a Draftsman working for an Architectural Millwork Shop in Reading, PA. Most of our work consisted of Plastic Laminate Frameless Cabinets and while I had plenty of experience on the Shop Floor, I was new to AutoCAD. As I learned in the ins and outs of Millwork Drafting Fundamentals, I was assigned a lot of the repetitive work that came in for chain locations.
“I need you to draw this Customer Service Station for Redner’s Warehouse Markets. It is pretty much the same thing we did at another location last year. Duplicate those drawings and then modify what you need to match the conditions at this location.”
It wasn’t difficult work, and it was a great way to learn the ropes. I must say, though, I was never fond of using other draftsman’s drawings. I have a bit of OCD, and things like sloppy leaders and dimensions drive me crazy. As I worked on modifying those drawings, I always spent time lining up my dimensions and manually spacing them to look neat.
The process was tedious. I would locate the first dimension based on what looked good, then strike a Construction Line. I would then offset that line and drag the next row of dimensions into place. I would repeat the process until all of my dimensions were organized how I liked them.
Learning About the AutoCAD DimSpace Command
One day, while working on some customer drawings for Superior Shop Drawings, Steve took notice of my tedious dimensioning process. “You know, there is a way faster way to do that – just type DimSpace into the Command Line.” That first time I used the command felt like magic, and I realized it would save me loads of time!
The AutoCAD DimSpace Command automates everything I did previously and dramatically reduces the number of clicks. I loved the command so much that we put it into our Millwork Drafting Standards and encouraged our team to take full advantage of the tool.
Using The AutoCAD DimSpace Command
Using the AutoCAD DimSpace command is quite simple. You can follow along with the Command Line Prompts within AutoCAD or continue reading for step-by-step instructions.
For additional information, please see the Autodesk Documentation on this subject.
Enter the DimSpace Command
Start by either typing DimSpace into the AutoCAD Command Line or locating the Adjust Space button within the Annotation Toolbar. Clicking the button will initiate the command.

Select Base Dimension
In the AutoCAD Command Line, you will see a prompt to Select your Base Dimension. This is the dimension that AutoCAD will use to reference for the following steps in the DimSpace Command.
Single (Left) Click on the Dimension you want to use as your Base Dimension. Unlike some other AutoCAD Commands, right-clicking after your selection is not required, and the right-click will exit the command.
Select Dimensions to Space
After a single Left Click on your Base Dimension, AutoCAD will prompt you to select the dimensions you want to space. You can now click on a single dimension, several dimensions, or window around multiple dimensions.
When finished making your selections, Right-Click or Press Enter / Spacebar to proceed to the next step.
Enter a Value
At this stage of the DimSpace Command, AutoCAD will prompt you for a value. The default value is [Auto] or you can key in a value of your choosing. After entering your value, press Enter / Spacebar to proceed with the command.
Value: 0
Entering a zero value will cause AutoCAD to align your dimensions with no space between them. This is handy if you have a series of dimensions and want to ensure they are in line with one another. Please remember that this could cause dimensions to stack on top of one another and overlap.
Value: Auto
Auto is the default value for the DimSpace Command. AutoCAD will take the Base Dimension Text Height and double it. For example, if you were dimensioning at 1-1/2″ = 1′-0″ Scale and your Text Height was 3/4″ (3/32 before Annotative Scaling), then AutoCAD would space your dimensions at 1-1/2″ apart.
Value of Your Choosing
Manually setting a value in the Command Line will cause AutoCAD to space your dimensions by that value. For example, if you entered 6″, AutoCAD would proceed to space your dimensions 6″ apart.
One thing to keep in mind is that AutoCAD works from Left to Right. If you want a row of dimensions to be in-line, they must be situated that way (manually placing them or using the DimSpace Command with a Value of 0) before proceeding. Otherwise, AutoCAD will space each dimension as they appear in the drawing.
In the Example Below, a DimSpace Value of 2″ was used with the 1/8″ dimension used as my Base Dimension. Dimensions that are aligned will remain aligned throughout the spacing process. The Section View on the Left was before the DimSpace Command, and the Section on the Right was After the DimSpace Command.

Annotative Scaling and Alignment
Earlier in this Blog Post, I mentioned that I can be a bit OCD about certain aspects of my drawings. Here at Superior Shop Drawings, we like to keep our Millwork Shop Drawings neat and tidy. We do this by using a common plane for various views. This means that if we have an Elevation View and a Section View on the same sheet, we will align them so that they share a Common Floor.
In order for our Dimensions to line up across the sheet, we need to think about Scale Factors and how the drawings are affected within the viewport. Using the Dimensional Spacing Chart below, we can ensure that in Paper Space, the dimensional spacing is always the same, regardless of the Viewport Scale.

Dimensional Spacing Chart
| Scale | Scale Factor | Base Dimension | DimSpace |
|---|---|---|---|
| 1′-0″ = 1′-0″ | 1 | 0.375″ | 0.25″ |
| 6″ = 1′-0″ | 2 | 0.75″ | 0.5″ |
| 3″ = 1′-0″ | 4 | 1.5″ | 1″ |
| 1-1/2″ = 1′-0″ | 8 | 3″ | 2″ |
| 1″ = 1′-0″ | 12 | 4.5″ | 3″ |
| 3/4″ = 1′-0″ | 16 | 6″ | 4″ |
| 1/2″ = 1′-0″ | 24 | 9″ | 6″ |
| 3/8″ = 1′-0″ | 32 | 12″ | 8″ |
| 1/4″ = 1′-0″ | 48 | 18″ | 12″ |
| 3/16″ = 1′-0″ | 72 | 27″ | 18″ |
| 1/8″ = 1′-0″ | 96 | 36″ | 24″ |
Base Dimension Value
Superior Shop Drawings Dimension Standards are set up so that our Base Dimension (not to be confused by the Base Dimension Prompt in the DimSpace Command) is placed a prescribed distance away from a given object. In the case of our example above, we’re placing our first row of dimensions 1.50 times our DimSpace Value.
For example, at 1″ = 1′-0″ Scale our Base Dimension Value would be 4-1/2″ from the object. If we were using a scale of 1-1/2″ = 1′-0″ then our first row of dimensions would be placed 3″ from the object. These dimensions are manually located – often by offsetting Construction Lines.
DimSpace Value
The Superior Shop Drawings DimSpace value is calculated proportionally to the Scale Factor of the Viewport Scale. This is the value we use within the DimSpace Command to ensure that all dimensions, regardless of the Viewport Scale, print at the same distance. This value, combined with a consistent Base Dimension Value, ensures that any view that shares a Common Plane will align when printed.
Work with Superior Shop Drawings
Are you an Architectural Millwork Shop or a Custom Cabinetmaker in need of Shop Drawings? Steve and Walt have been in the Cabinet Industry for over 20 years and specialize in creating Shop Drawings for Commercial and Residential applications using AutoCAD. We are happy to discuss your next project and provide a free quote.
This simple position allowed him to get his proverbial foot in the door and choose Cabinetmaking as a Career path in High School.
With more than twenty years of combined experience as both a Cabinetmaker and Draftsman - Walt uses his experience to Engineer and Produce Millwork Shop Drawings.
- Millwork Shop Drawings: Training Survey - May 5, 2024
- Optimize Your Shop Drawings: Exploring the Power of theAutoCAD DimSpace Command - December 5, 2023
- The 4 Grades of Kitchen Cabinets: What Does It All Mean? - November 28, 2023


